For everyone who is not familiar with the Sega Saturn switchless mod here is some background information:
It originated from Sebastian Kienzl (Seb) who kindly provided the tutorial and code for this mod (http://knzl.de/saturnmod).
There you can read the details so I list only a short summary:
- You can switch between regions (PAL, JAP, USA)
- You can switch between 50 Hz and 60 Hz
- No visible modification from the outside
- All switching is controlled with reset button (normal reset still possible)
- Visual feedback of activated region (LED flashes in red, orange or green)
Here is what you will need for this mod:
Tools:
- Soldering Iron
- Phillips screwdriver
- Box cutter
Material:
- 1x PIC 16F630 flashed with Seb’s code
- 1x duo-LED (red-green) with 3 legs
- 2x 220Ω resistors
- 1x Sega Saturn modchip V2
- Some wires (different colors are recommended)
- Soldering tin
- Solder braid (very recommended even if you have much experience in soldering)
- double-sided foam tape (not necessary but makes your life easier)
I oriented myself on the very good tutorials of wolfsoft and mmmonkey which were very helpful.
http://www.mmmonkey.co.uk/sega-saturn-switchless-region-and-video-mod
http://wolfsoft.de/wordpress/?p=354
http://wolfsoft.de/wordpress/?p=373
Please keep in mind that there are different mainboard layouts existing for the Sega Saturn. The priciple is always the same but the wiring of the jumpers that are responsible for region configuration could be sometimes a little bit confusing.
Here you can find a very good explanation of how the jumpers work. I strongly recommend reading and understanding them before you start:
http://www.gamesx.com/wiki/doku.php?id=imports:sega_saturn
http://www.gamesx.com/importmod/saturncon2.htm
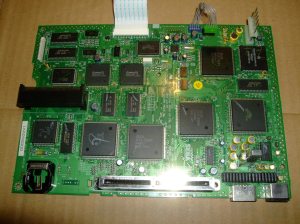
After I unscrewed the console I looked at the mainboard:
It is very similar to the one that wolfsoft modded (http://wolfsoft.de/wordpress/?p=373).
You can use it in addition to this guide.
The main difference to the other kind of mainboards is that the controller ports are installed on a separate PCB which is connected with a ribbon cable to the mainboard
Ok, let’s start with the mod 🙂 Read the whole Tutorial
